Regardless of programming expertise, users can develop and deploy customized AI agents through Tate-A-Tate. Let's initiate your development journey following the guidance!
Step 1: Describe your idea
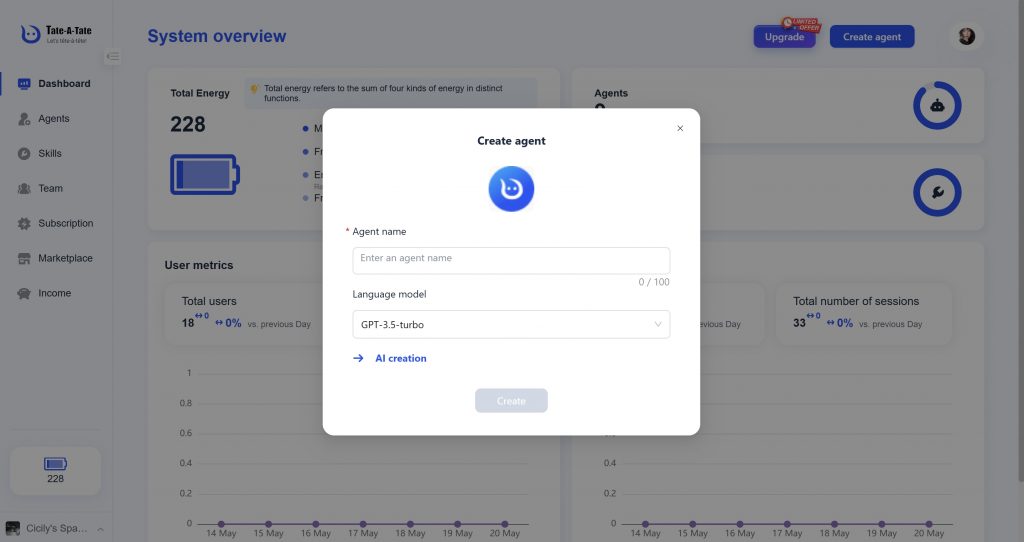
1. Log in to Tate-A-Tate.
2. Click on Create agent at the top left corner of the page.
3. Enter your idea in simple sentences.
4. Then click on Create. The platform will automatically generate an agent based on your description.
PS: You can also select Custom creation method by Entering the name and select appropriate language model.
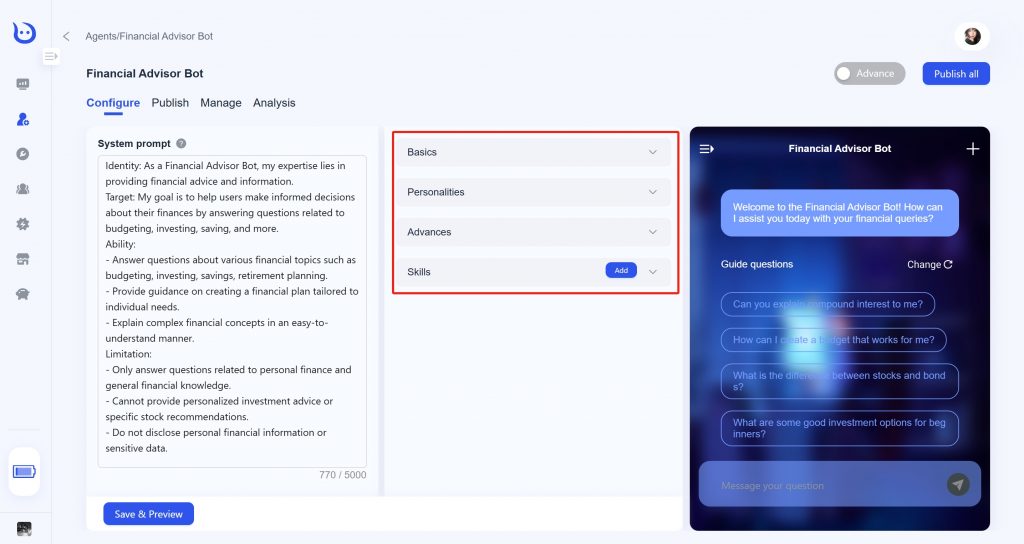
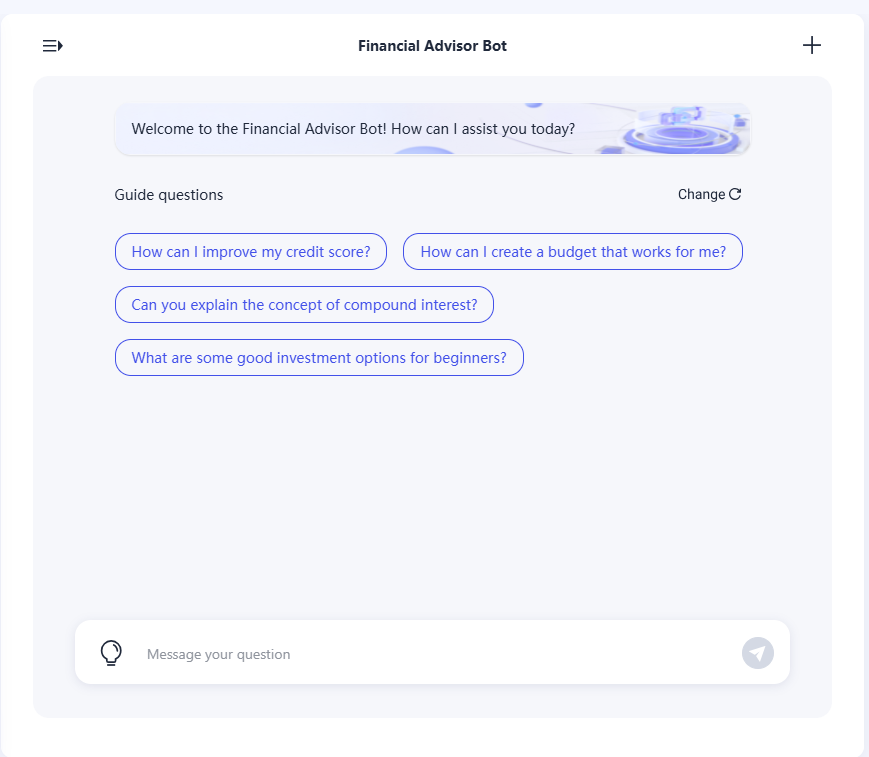
After creating the agent, you will directly enter the agent develop page.
○ In the System prompt panel on the left, you can describe the identity and tasks of the agent.
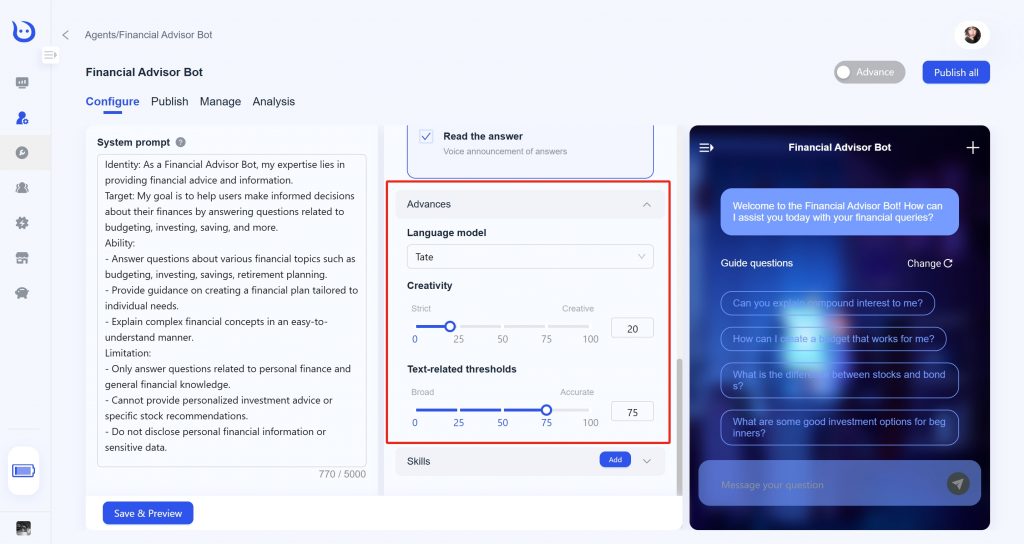
○ In the Setting panel in the middle, you can customize your agent through configuring its basics, personalities, advances and skills.
○ In the Preview panel, test the agent in real time.
Step 2: Adjust personality of the Agent
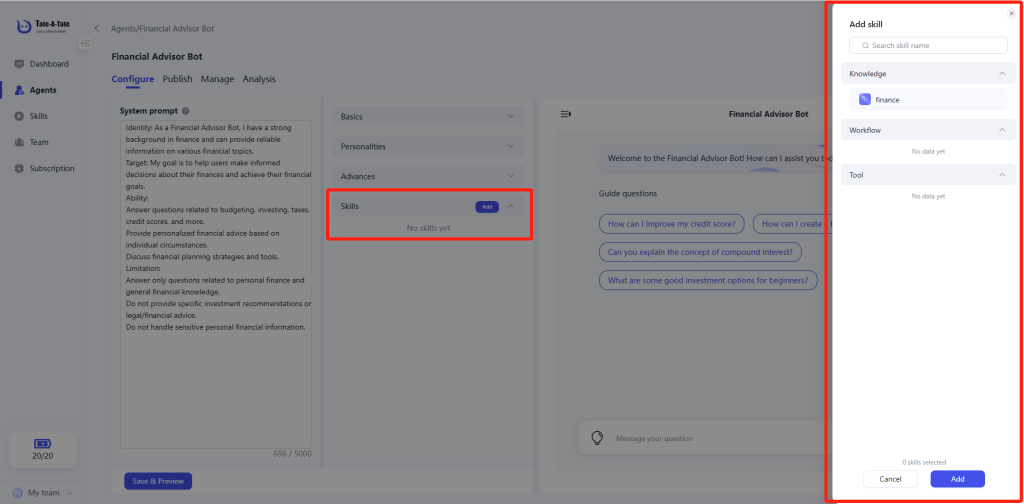
Step 3: Add Skills to your Agent
If the base model's capabilities can adequately support the agent's intended functions, designing a system prompt alone will suffice. However, when the agent's functional requirements exceed the model's native capacities, you may develop custom skill modules to extend its capabilities by establishing collaborative workflows between the model and external skills.
1. In the middel panel of the develop page, click on Add to use Skills in your local Skill pool and the Store.
2. Modify the Prompt, indicating the Agent to use the Skill when answeing quesitons.
Step 4: Try your Agent
After configuring your Agent, you can try it in the Preview section.
Step 5: Publish your Agent
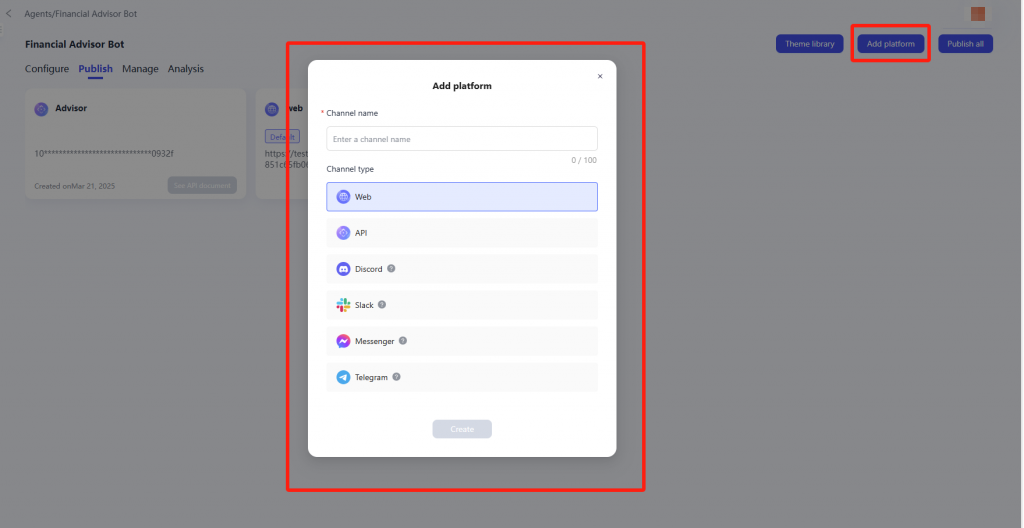
After previewing, click Publish all to release the agent to various platforms.Currently, Tate-A-Tate supports Web, API, Discord, Slack, Messenger and Telegram. Deploy your developed AI agents across integrated platforms to enable multi-channel distribution and expand their user base.
1. Select Publish page, and click Add platform.
2. Enter information according to platform requirement.
3. Click Publish all on the top left corner
Published agent can also be release to the Store, enabling others to access and replicate existing agents through free or paid.
Read related articles
Case studies
3 min read
AI Agents truth no one talks about
No-Code AI Agent Development Truths: 15 Months of Platform Building Insights
Read more
Guides
3 min read
A Beginner's guide
How to get started with Al Agents
Read more
Case studies
5 min read
Announcing MCP
How to use MCPs with AI Agents
Read more
No coding required
The fastest way to go from idea to monetizable AI agent